

 English
 中文简体
中文简体Content
- 1 What Is an Automotive Relay and Why Do They Fail?
- 2 Tools You'll Need Before Testing
- 3 How to Identify Relay Terminals (Pinout Basics)
- 4 Method 1 — The Swap Test (Quickest Check)
- 5 Method 2 — Multimeter Continuity and Resistance Test
- 6 Method 3 — In-Circuit Voltage Drop Test
- 7 Interpreting Your Results — What Each Failure Means
- 8 Testing Relays Still Mounted in the Fuse Box
- 9 Common Mistakes to Avoid When Testing Relays
- 10 When to Replace vs. When to Investigate Further
Testing an automotive relay takes less than 5 minutes with a basic multimeter or a 12V test circuit. The fastest method: apply 12V to the relay's coil terminals and listen for a click — if the internal switch closes and allows current to pass through the load terminals, the relay is good. If there's no click or no continuity across the load terminals, the relay has failed and needs replacement.
This guide walks through every reliable testing method — from a simple swap test to precise multimeter diagnostics — so you can pinpoint relay failure with confidence.
What Is an Automotive Relay and Why Do They Fail?
An automotive relay is an electrically operated switch that uses a small control current to switch a much larger load current. They are commonly used to control high-draw components such as fuel pumps, cooling fans, starter motors, headlights, and horn circuits.
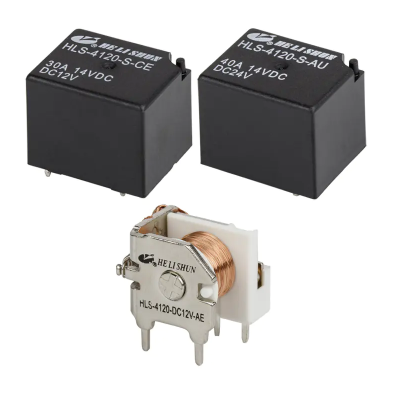
Most standard automotive relays follow a 4-pin or 5-pin layout (ISO mini relay). The two coil terminals energize an electromagnet; the remaining terminals form the switch contacts that carry the load current.
Common failure modes include:
- Burned or welded contacts (relay stays permanently closed)
- Open coil winding (relay never activates)
- Corroded terminals causing intermittent behavior
- Broken internal spring (contacts don't return to open position)
Understanding which part has failed helps you choose the right test method below.
Tools You'll Need Before Testing
You don't need specialized equipment. Most relay tests can be completed with one or two of the following:
- Digital multimeter — for coil resistance, continuity, and voltage checks
- 12V DC power source — a vehicle battery or bench power supply
- Two jumper wires with alligator clips — to energize the coil manually
- A known-good identical relay — for the swap test
- Relay wiring diagram or pinout chart — usually on the relay body or in the vehicle's service manual
How to Identify Relay Terminals (Pinout Basics)
Before testing, identify each terminal. Most mini ISO relays follow this standard numbering:
| Terminal Number | Function | Label |
|---|---|---|
| 85 | Coil ground | Control circuit (–) |
| 86 | Coil power | Control circuit (+) |
| 30 | Common (input) | Load circuit input |
| 87 | Normally open (NO) | Load output when energized |
| 87a | Normally closed (NC) | Load output when de-energized (5-pin only) |
The terminal numbers are usually molded into the relay housing. If not, consult the fuse box cover diagram or the vehicle's wiring schematic.
Method 1 — The Swap Test (Quickest Check)
The swap test is the fastest diagnostic step. It requires no tools — only an identical spare relay.
- Locate the suspect relay in the fuse/relay box.
- Find another relay in the same box with an identical part number or shape.
- Swap them directly — no tools needed for most plug-in relays.
- Test the circuit that was failing. If it now works, the original relay was defective.
Limitation: This confirms a failed relay but does not reveal how it failed. For root-cause diagnosis, continue with multimeter testing.
Method 2 — Multimeter Continuity and Resistance Test
This is the most thorough bench test. Remove the relay from the vehicle before starting.
Step 1 — Test Coil Resistance
Set your multimeter to the resistance (Ω) mode. Place probes on terminals 85 and 86 (the coil terminals).
- Good relay: Reading between 50–120 Ω (most 12V automotive relays fall in this range; check your relay's datasheet for the exact spec)
- Open coil (failed): OL or infinite resistance — relay cannot energize
- Shorted coil: Near 0 Ω — relay draws excessive current and may damage the control circuit
Step 2 — Check Switch Contacts at Rest
With the relay still de-energized, set the multimeter to continuity mode:
- Probe terminals 30 and 87 (normally open contacts) — no continuity expected (open circuit)
- Probe terminals 30 and 87a (normally closed, 5-pin only) — continuity expected (audible beep)
If the normally open contacts already show continuity, the contacts are welded shut — a failed relay that could cause the controlled circuit to run continuously.
Step 3 — Energize the Coil and Retest Contacts
Connect 12V positive to terminal 86 and ground to terminal 85 using jumper wires. You should hear a distinct click as the armature pulls in.
- Now probe 30 and 87 — continuity must be present
- For 5-pin: probe 30 and 87a — no continuity expected (contacts have switched open)
If the relay clicks but 30–87 continuity is absent, the internal contacts are burned or pitted — the relay has failed electrically even though the coil operates.
Method 3 — In-Circuit Voltage Drop Test
When you can't remove the relay or want to test it under real load conditions, use a voltage drop test with the relay installed in the vehicle.
- Activate the relay's circuit (turn on the ignition/accessory as appropriate).
- Set the multimeter to DC volts.
- Measure voltage across the relay's load terminals (30 and 87) while the circuit is active.
- Healthy relay: Voltage drop across contacts should be less than 0.1V under load
- Worn or corroded contacts: Drop of 0.3V or more — causes heat buildup and unreliable operation
- No voltage at terminal 87: Relay contacts are not closing — coil or contact failure
This test is particularly useful for diagnosing relays controlling cooling fans or fuel pumps that work intermittently under thermal load.
Interpreting Your Results — What Each Failure Means
| Test Result | Likely Cause | Symptom in Vehicle |
|---|---|---|
| Infinite coil resistance (OL) | Open coil winding | Circuit never activates |
| No click when energized | Broken coil or seized armature | No response from controlled component |
| Click present, no continuity (30–87) | Burned/pitted contacts | Component fails to receive power despite relay activating |
| Continuity on 30–87 without energizing | Welded contacts | Component runs constantly, even with ignition off |
| Voltage drop > 0.3V across contacts | Corroded or worn contacts | Weak performance, heat, intermittent faults |
Testing Relays Still Mounted in the Fuse Box
In some vehicles, relays are soldered to a circuit board or are difficult to remove. For these, testing must be done in-circuit. Use these steps:
- Use a wiring diagram to identify the back-probe points for each relay terminal on the connector side.
- With the circuit inactive, verify 12V is present at terminal 86 (coil power side) and that terminal 85 has a valid ground path.
- Activate the circuit. Confirm voltage appears at terminal 87 (load output). A reading of battery voltage minus less than 0.1V confirms good contacts.
- If terminal 86 has no power, the fault is upstream (switch, fuse, ECU output). If 86 has power but the relay won't click, the relay coil or ground path is faulty.
Common Mistakes to Avoid When Testing Relays
- Testing the wrong relay: Multiple relays often look identical. Always confirm the relay's circuit from the fuse box diagram before condemning it.
- Ignoring the relay socket: A good relay in a corroded socket still causes faults. Inspect and clean the socket terminals if voltage drop is present.
- Not testing under load: Some contacts pass a bench continuity test but fail under the actual current draw. Always perform a voltage drop test for high-current relays (cooling fans, starter circuits).
- Overlooking control-side faults: If the relay never activates, check that the coil is receiving both power and a proper ground — the relay itself may be fine.
- Skipping the audible check: A relay that clicks audibly under power but fails continuity testing points specifically to contact failure, which changes the diagnosis.
When to Replace vs. When to Investigate Further
Automotive relays are inexpensive and not designed to be repaired. Replace any relay that fails coil resistance, contact continuity, or voltage drop tests. Attempting to clean or re-use a relay with burned contacts is unreliable and risks recurring failures.
However, replacing the relay alone is not always enough. If a relay fails due to contact welding, investigate what caused the overload — a seized motor, a short circuit, or an undersized relay for the application. Fitting a replacement without addressing the root cause will result in the new relay failing in the same way.
For intermittent faults that are difficult to reproduce on the bench, try to test the relay when the fault is actively present — often this means testing it when warm, after extended use, or while flexing the connector harness to expose any loose connection.


