

 English
 中文简体
中文简体Content
- 1 Understanding the DPDT Relay Pin Configuration
- 2 Required Components Before You Wire a DPDT Relay
- 3 How to Wire a DPDT Relay Step by Step
- 4 Using a DPDT Relay to Reverse DC Motor Direction
- 5 Switching Between Two Power Sources with a DPDT Relay
- 6 DPDT Relay vs Other Relay Types for Circuit Control
- 7 Common Wiring Mistakes and How to Avoid Them
- 8 Practical Tips for Reliable Long-Term DPDT Relay Operation
A Double Pole Double Throw (DPDT) relay lets you control two separate circuits simultaneously with a single switching action. It acts as an electrically operated switch with two independent poles, each capable of connecting to one of two possible outputs. This makes it ideal for reversing motor direction, switching between two power sources, or toggling two loads at once.
In practical terms, when the relay coil is energized, both poles switch from their Normally Closed (NC) contacts to their Normally Open (NO) contacts at the same time. This synchronized dual switching is the core advantage of a DPDT relay over simpler relay types.
Understanding the DPDT Relay Pin Configuration
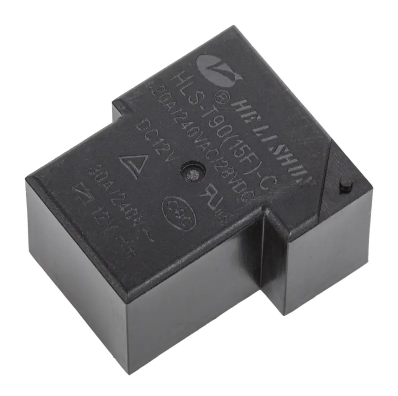
A standard DPDT relay has 8 pins: 2 coil pins and 6 switching pins. Understanding each pin's role is essential before wiring.
| Pin Label | Function | Description |
|---|---|---|
| Coil+ / Coil− | Electromagnet Input | Apply control voltage here (e.g., 5V, 12V, 24V DC) to activate the relay |
| COM1 / COM2 | Common (Pole 1 & 2) | The movable contact for each pole; connects to NC or NO depending on coil state |
| NO1 / NO2 | Normally Open | Connected to COM when coil is energized |
| NC1 / NC2 | Normally Closed | Connected to COM when coil is de-energized (default state) |
Always verify the pinout on your specific relay's datasheet, as physical pin layouts vary between through-hole and PCB-mount packages.
Required Components Before You Wire a DPDT Relay
Gather the following before starting any DPDT relay wiring project:
- DPDT relay rated for your load voltage and current (e.g., 10A/250VAC contact rating)
- Control voltage source matching the relay coil specification (5V, 12V, or 24V DC)
- A flyback diode (e.g., 1N4007) to protect the control circuit from voltage spikes
- A transistor (e.g., 2N2222 or BC547) if driving from a microcontroller with limited current output
- Base resistor (typically 1kΩ) for the transistor driver stage
- Multimeter for continuity testing and voltage verification
- Appropriate wire gauge for the load current being switched
Never omit the flyback diode when driving an inductive coil relay from a transistor or microcontroller. The back-EMF spike can exceed 50V and damage sensitive components instantly.
How to Wire a DPDT Relay Step by Step
Follow these steps to correctly wire a DPDT relay into your circuit:
- Identify the coil pins using the datasheet and connect the positive coil pin to your control signal (or transistor collector), and the negative coil pin to ground.
- Install the flyback diode across the coil pins with the cathode (banded end) toward the positive coil terminal. This clamps inductive kick.
- Connect your load's common wire to COM1 (and COM2 if using both poles). This is the wire that will be routed to either NC or NO depending on relay state.
- Wire the NO contacts to the circuit or power path you want active when the relay is energized.
- Wire the NC contacts to the circuit you want active in the relay's default (de-energized) state.
- Test with a multimeter in continuity mode: with the coil off, verify COM–NC continuity and COM–NO open. Energize the coil and confirm the opposite.
- Apply the full load only after confirming correct switching behavior at low voltage.
If using a microcontroller GPIO pin (typically limited to 20–40mA output), you must use a transistor driver stage since most relay coils draw 60–100mA at 5V.
Using a DPDT Relay to Reverse DC Motor Direction
One of the most common DPDT relay applications is H-bridge motor reversal. The relay's two poles swap the polarity of supply voltage to a DC motor, reversing its spin direction without any additional motor driver IC.
Wiring Logic for Motor Reversal
- Relay de-energized (NC state): COM1 connects to positive supply → Motor terminal A; COM2 connects to negative supply → Motor terminal B. Motor spins forward.
- Relay energized (NO state): COM1 connects to negative supply → Motor terminal A; COM2 connects to positive supply → Motor terminal B. Motor spins in reverse.
This approach works reliably for motors up to the relay's contact current rating. For a motor drawing 3A, use a relay rated for at least 5A continuous to provide a safety margin and reduce contact wear.
Important Precaution
Always include a brief dead time delay (50–100ms) in your control logic between switching directions. Immediately reversing a running motor can cause high inrush current spikes that degrade relay contacts over time.
Switching Between Two Power Sources with a DPDT Relay
A DPDT relay can function as an automatic transfer switch, toggling a load between a primary power source (e.g., mains supply) and a backup source (e.g., battery) when the primary fails.
| Relay State | COM1 Connected To | COM2 Connected To | Active Power Source |
|---|---|---|---|
| De-energized (NC) | Primary + line | Primary − line | Primary (mains/main supply) |
| Energized (NO) | Backup + line | Backup − line | Backup (battery/secondary) |
In this configuration, a voltage-sensing circuit monitors the primary source and energizes the relay coil when a fault is detected. Because both poles switch simultaneously, both the positive and negative paths are transferred together, eliminating ground loop issues common in single-pole transfer designs.
DPDT Relay vs Other Relay Types for Circuit Control
Choosing the right relay type depends on your circuit's specific switching needs. The table below compares common relay configurations:
| Relay Type | Poles | Throws | Best Use Case |
|---|---|---|---|
| SPST | 1 | 1 | Simple on/off switching of one circuit |
| SPDT | 1 | 2 | Routing one signal to one of two destinations |
| DPST | 2 | 1 | Simultaneously switching two circuits on/off |
| DPDT | 2 | 2 | Motor reversal, dual-source switching, polarity inversion |
The DPDT relay is the most versatile of the four standard types, effectively combining the capability of two SPDT relays in a single package and under one control signal.
Common Wiring Mistakes and How to Avoid Them
Even experienced builders encounter issues when wiring DPDT relays. Here are the most frequent errors and their solutions:
Confusing NC and NO Contacts
Connecting your load to NC when you intended NO (or vice versa) results in inverted switching logic. Always perform a continuity test before applying power: NC should show continuity with COM when the coil is unpowered.
Missing the Flyback Diode
Omitting the flyback diode is the single most common cause of microcontroller damage in relay circuits. The inductive coil generates a reverse voltage spike of up to 10× the supply voltage when switched off. A 1N4007 diode costs under a cent and prevents this entirely.
Exceeding Contact Current Rating
Running a relay at its maximum rated current reduces contact lifespan significantly. For a relay rated at 10A, keep the switched load below 7–8A in continuous use to maintain reliable long-term operation.
Using Wrong Coil Voltage
Applying 12V to a 5V coil relay will burn out the coil winding within minutes. Always match your control voltage to the relay's rated coil voltage, which is clearly printed on the relay body or datasheet.
Practical Tips for Reliable Long-Term DPDT Relay Operation
- Use a relay socket when prototyping — this allows quick swaps without soldering and simplifies testing.
- For high-cycle applications (thousands of operations per day), choose a relay with a mechanical life rating exceeding 10 million operations.
- When switching AC loads, add a snubber circuit (RC network: 100Ω + 0.1µF) across the contacts to suppress arcing and extend contact life.
- Mount the relay away from heat-generating components; coil resistance increases with temperature, reducing pull-in reliability above 85°C.
- Label your wiring at both the relay terminal and load end — DPDT relays have 8 connections and misidentification during maintenance is a common failure point.
- If electromagnetic interference (EMI) is a concern, use a relay with a built-in coil suppression diode (listed as "with diode" in the part number suffix).


